SLIC Decision Support Tool
How to use the SLIC DST ?
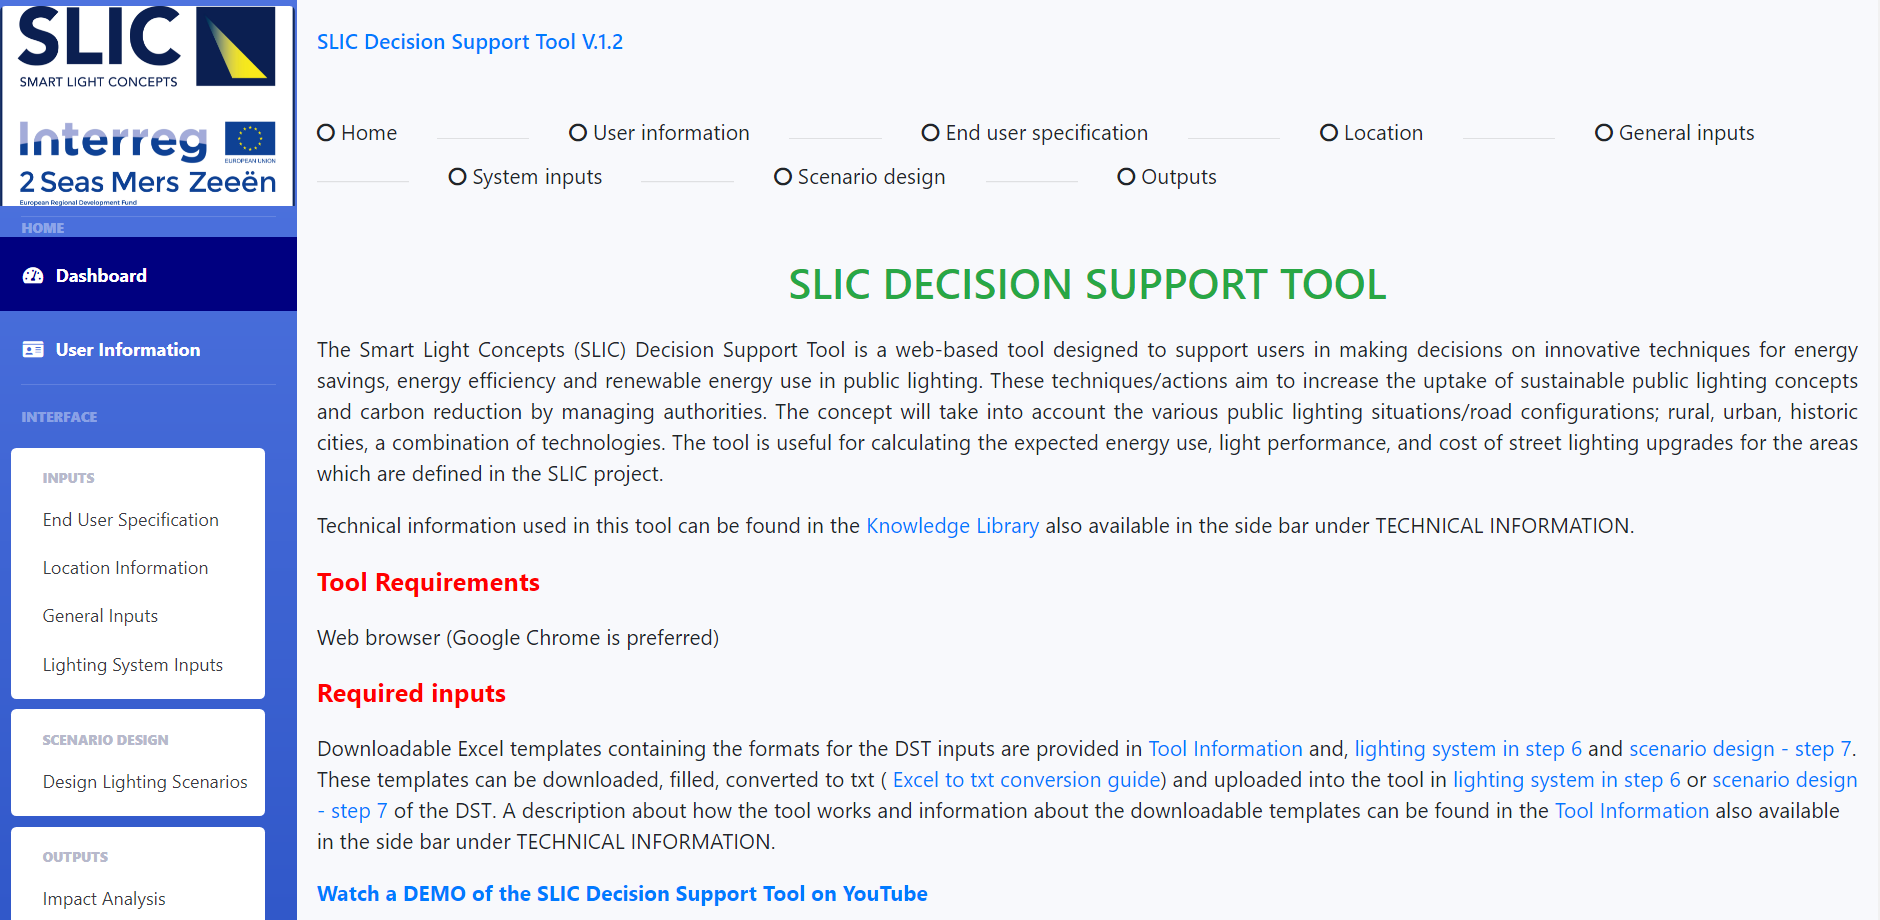
Home Page
Please read carefully general instructions about the tool in this page, also you can find youtube video link that demonstrates how to use the tool.
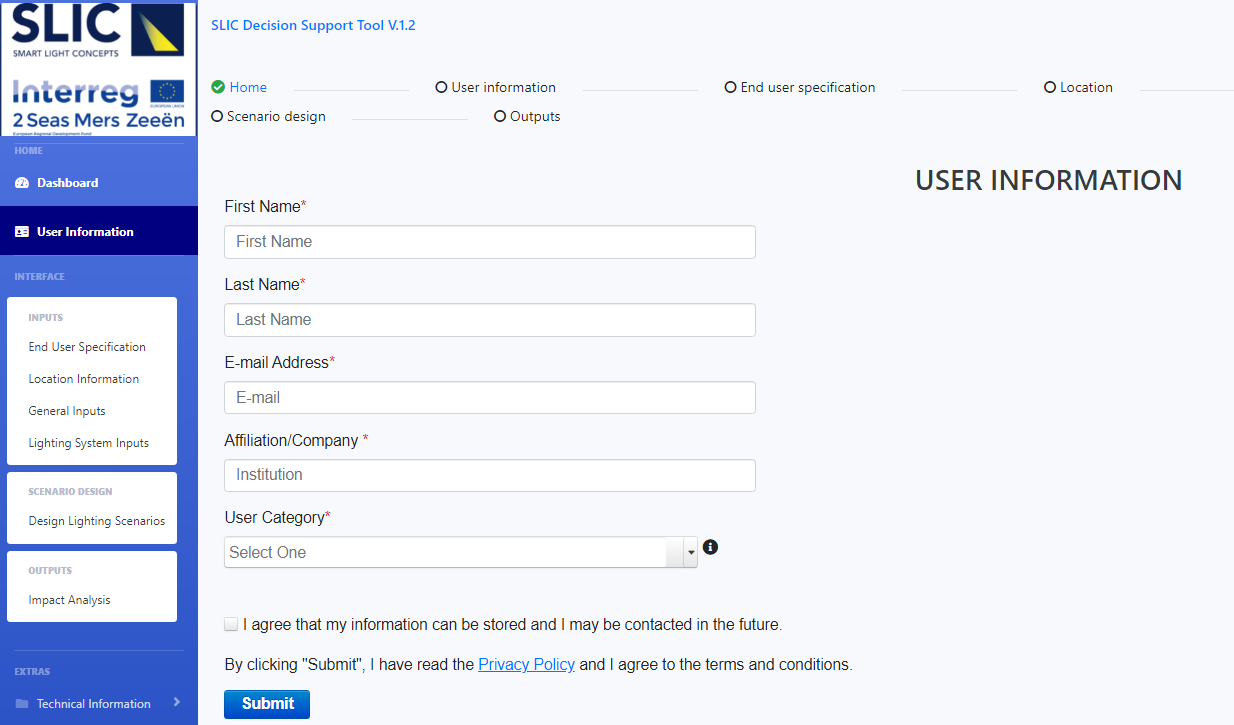
User Information
Please provide your details in this page. The purpose of collecting this data is solely for statistics such as how many times the tool is accessed.
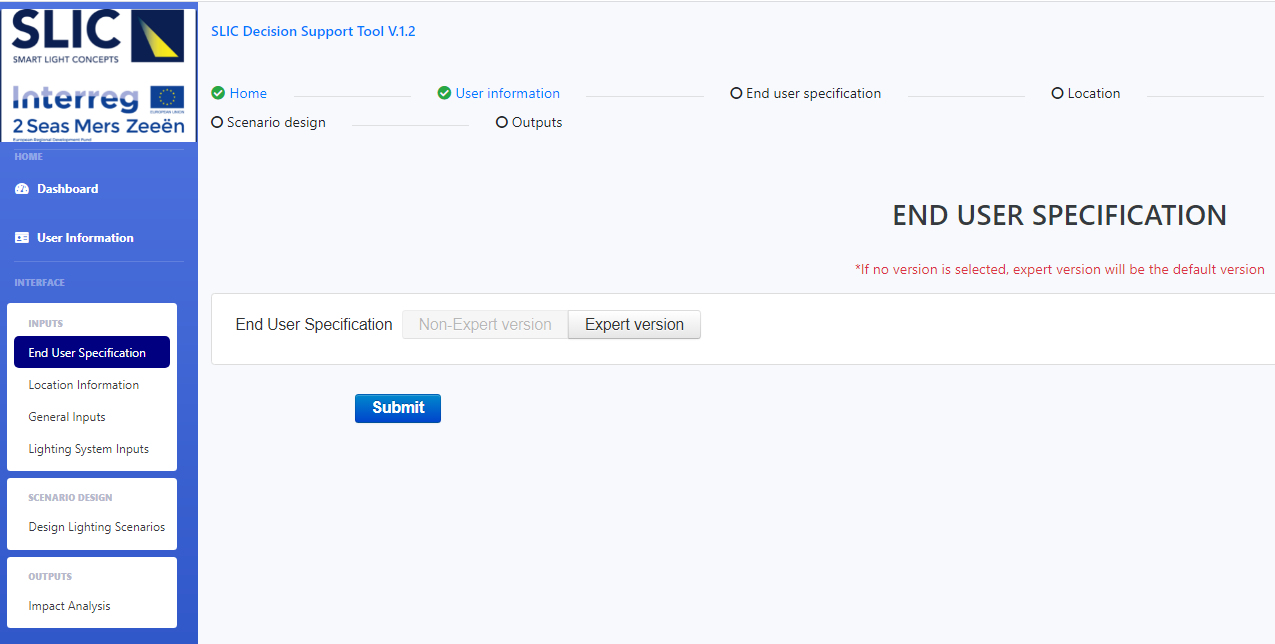
End User Specification
In this step, end user type is selected, where the tool inputs are adjusted accordingly.
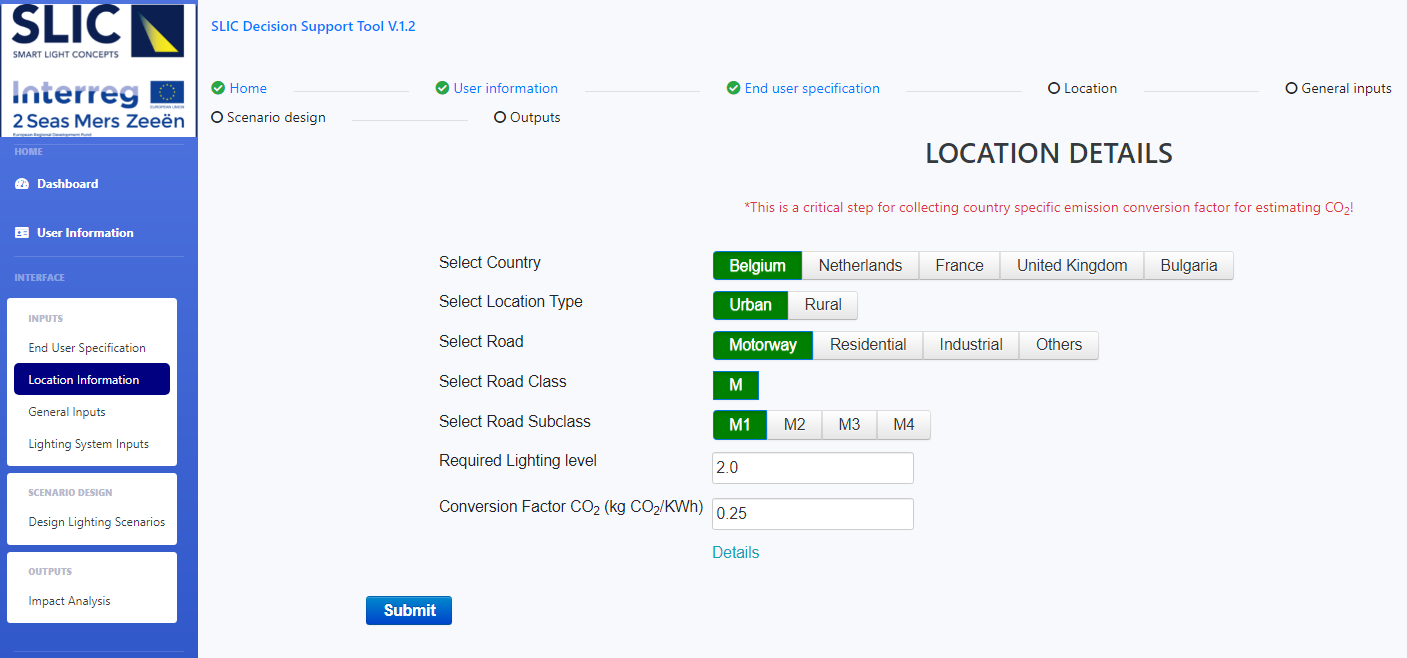
Location Information
Location details are specified in this step, this step is required to find out minimum lighting level for the lighting installation area.
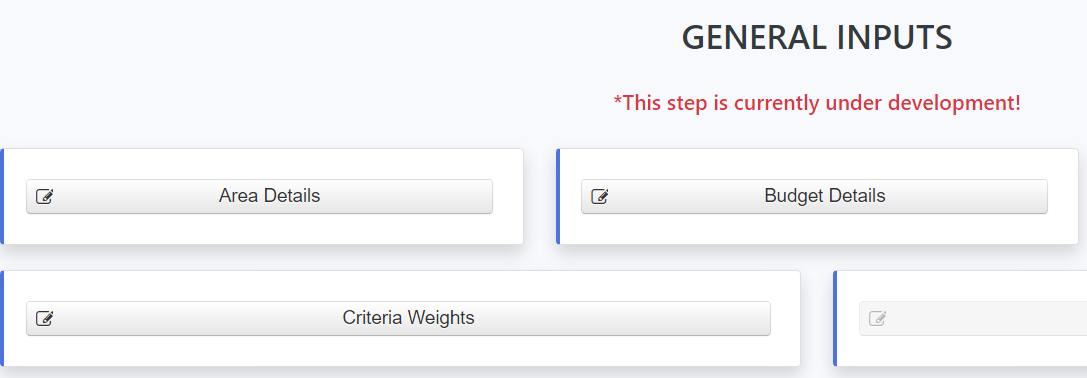
General Inputs
In this step general inputs are collected. These are; area specification, criteria parameters, etc.
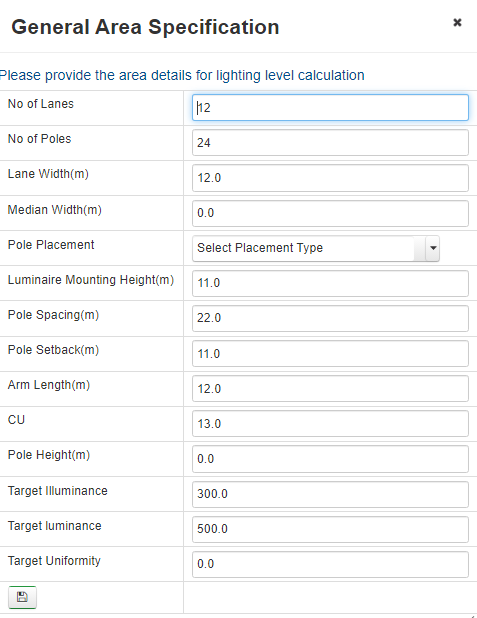
Area Inputs
In the photo, the inputs for area details are seen. These inputs are required to calculate lighting level.
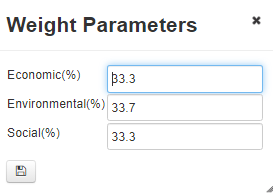
Weight Inputs
In the photo, the inputs for weighting criteria are seen. These inputs are required to adjust the cost contributions of different sustainability dimensions to final cost function in optimisation.
The other input fields will be activated soon
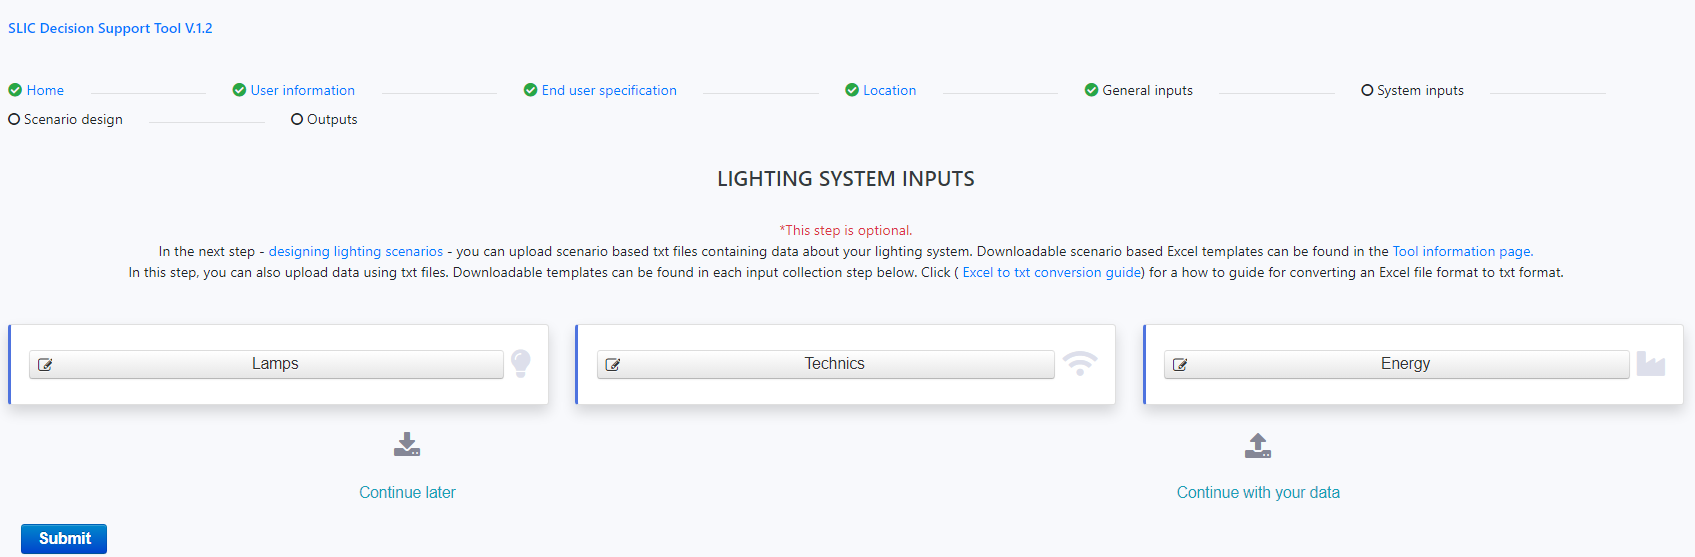
Lighting System Inputs
In this step inputs related to scenario design are collected; these are lamps, technics and energy sources.
If the data from previous session is saved, you can upload it with button "Continue with your data".
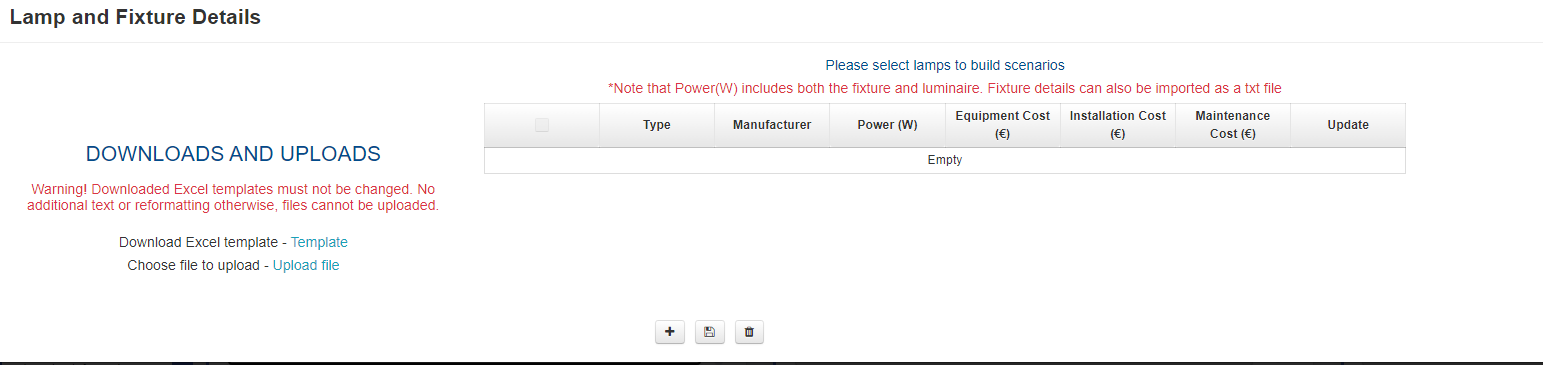
The image shows the lamp input box, in this part of this step, the lamp details are given to add new one or lamp details are updated.

The photo shows the input details for technics, these technics can be motion sensor, dimming etc.

The image shows the input details for energy sources. Energy sources can be gas, mixed, etc.

The energy sources in the list can be updated with update button, this button will open the dialogbox in the next image.
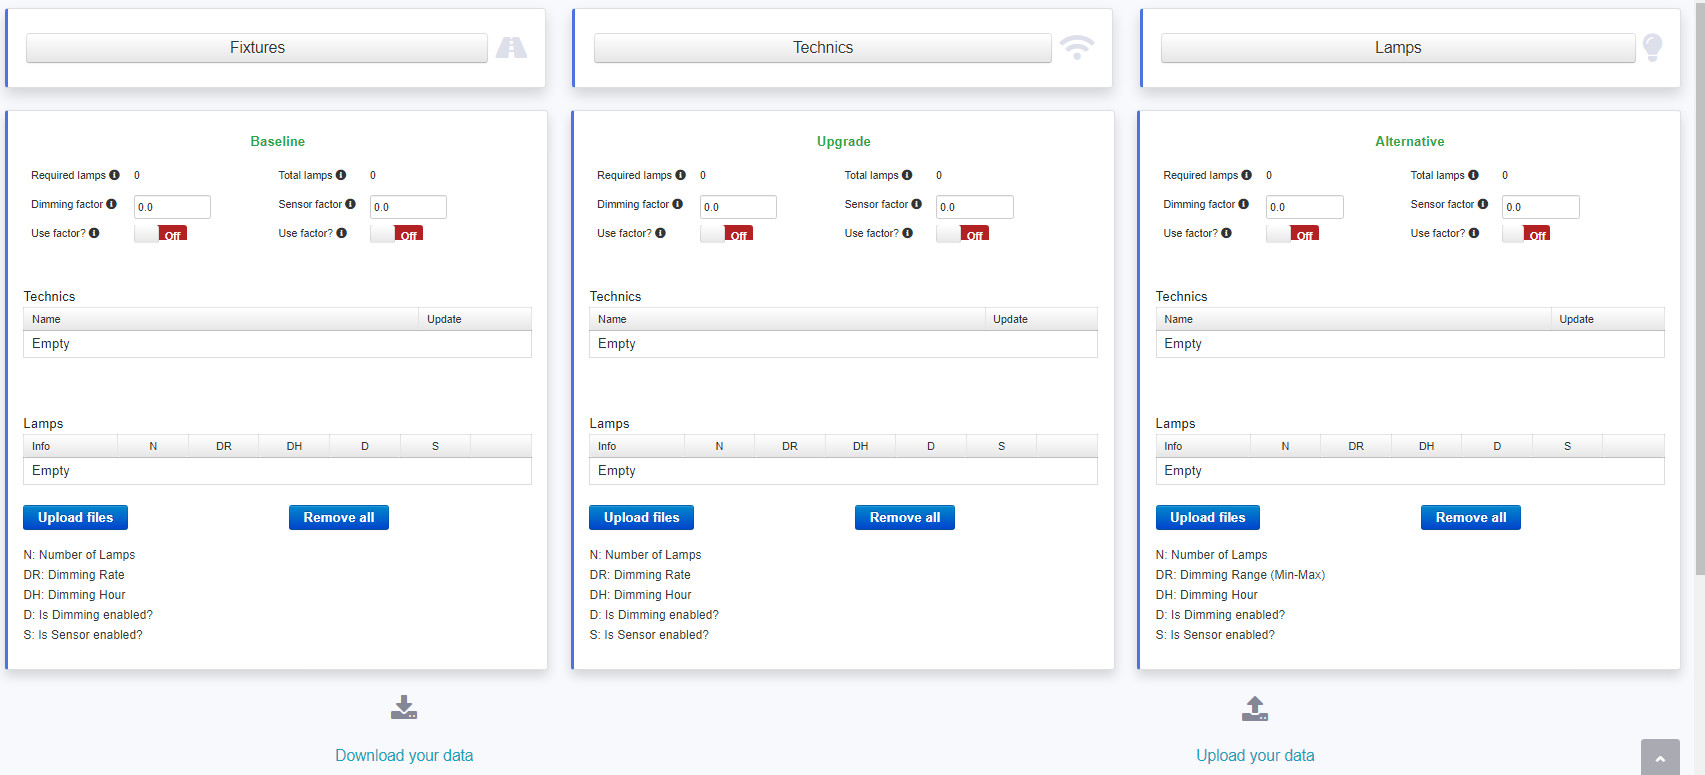
Design Lighting Scenarios
In this step fixture details, lamps, technics are collected for three different scenarios. These are baseline, upgrade and alternative.
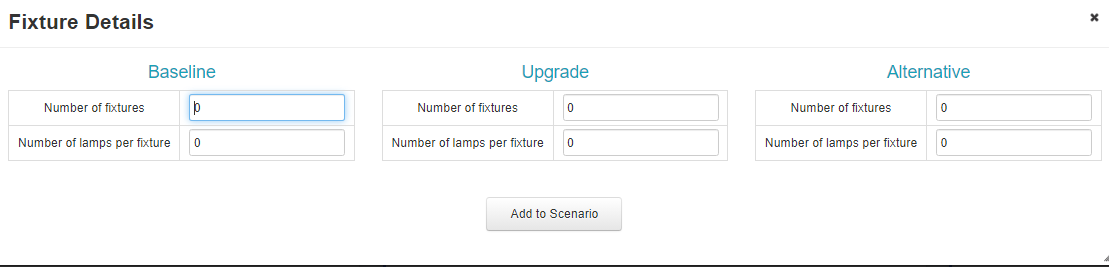
Fixtures
When fixtures button pressed, the image below will appear. In this screen, fixture related information is collected for each scenario. These inputs are required to calculate the number of lamps is needed for each scenario.

Technics
When technics button pressed, a page for technic related inputs will be opened. In this screen, technic related information is collected for each scenario.
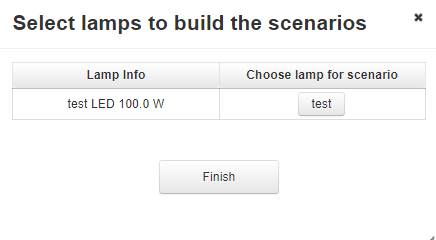
Lamps
When lamps button pressed, a page that lists selected lamps are opened.
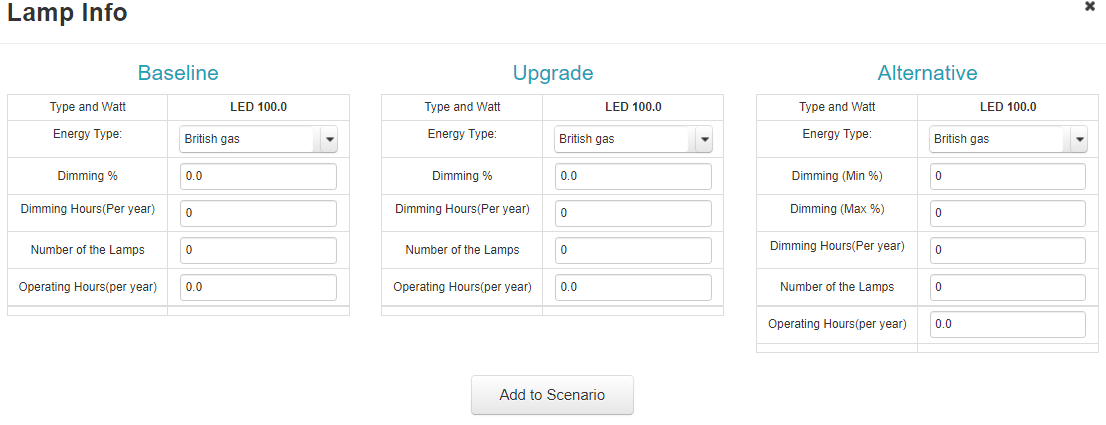
Lamps
In this page, lamp details for each scenario is filled. If the selected lamp is not be selected for one of the scenarios then the number of lamps for that scenario should be given as "0"
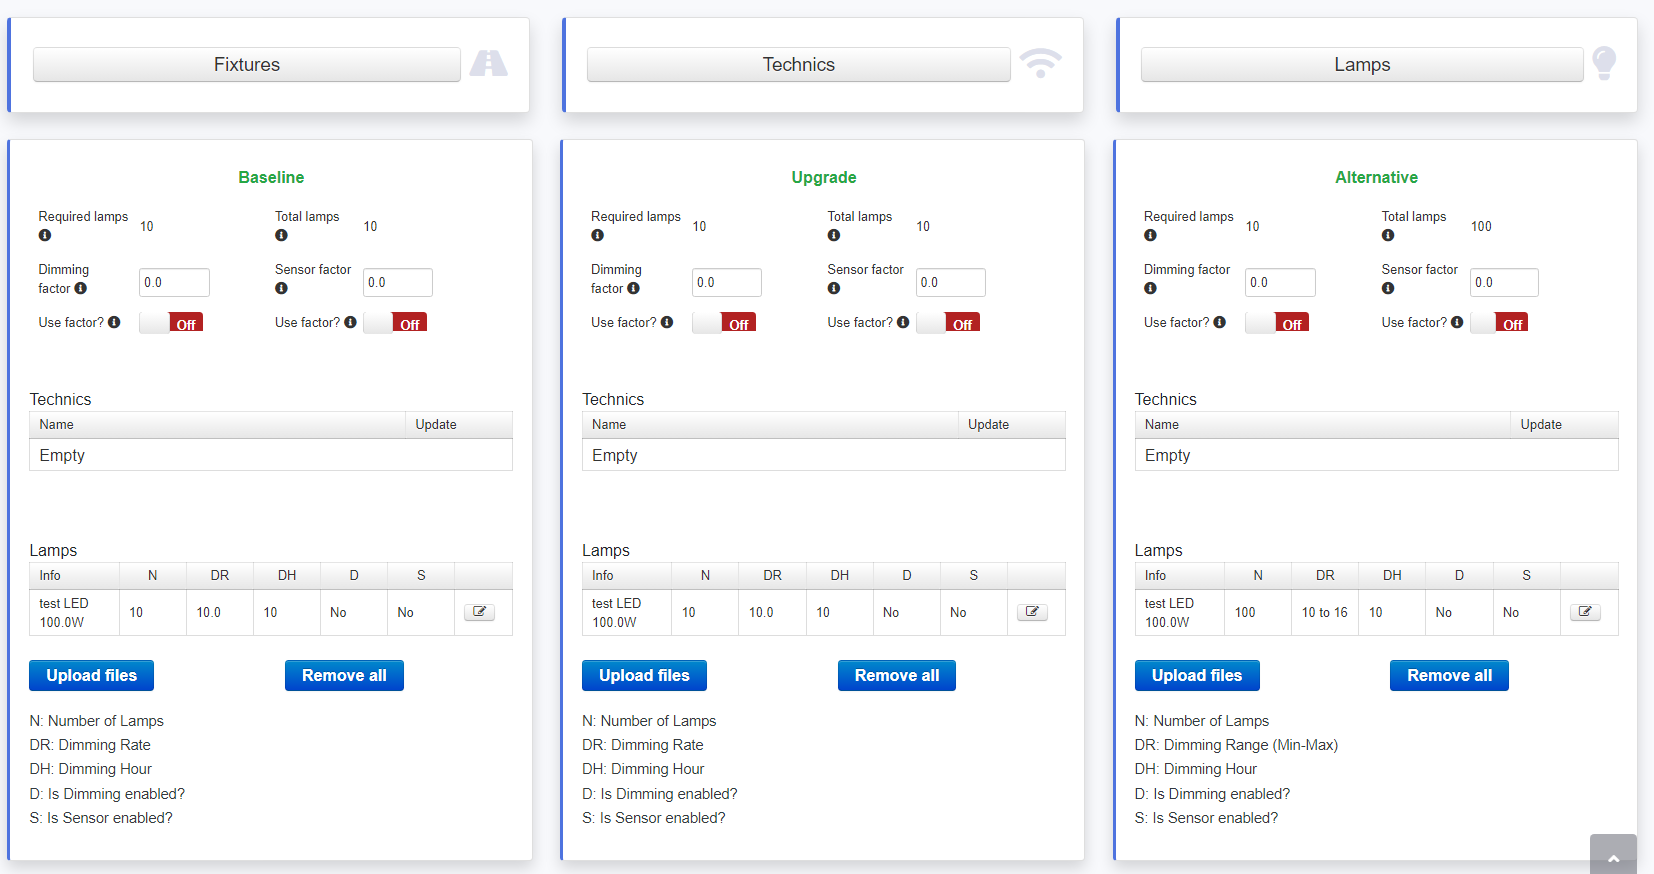
Lamps
After adding desired lamp details for each scenario, this lamp will be listed under scenarios.
Alternatively, the required lamp data for each scenario can be uploaded by using the template files with "Upload files" button.
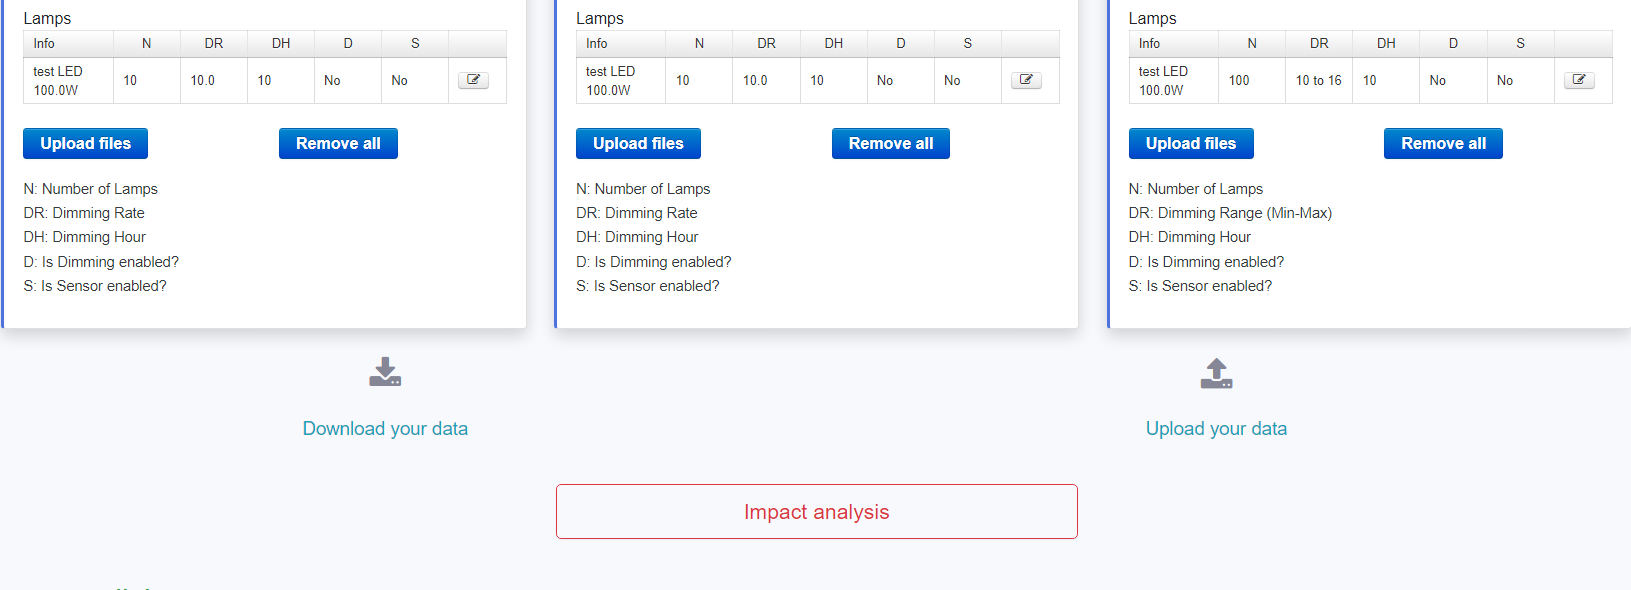
Lamps
Also, if there is any data from previous session, this data can be uploaded in this step directly. In this case all given inputs from previous session will be filled in this session as well. If any update is needed for the uploaded data, this can be done in related input pages. Finally, "Impact analysis" button will trigger the calculation for impact analysis, unless there is any missing inputs.
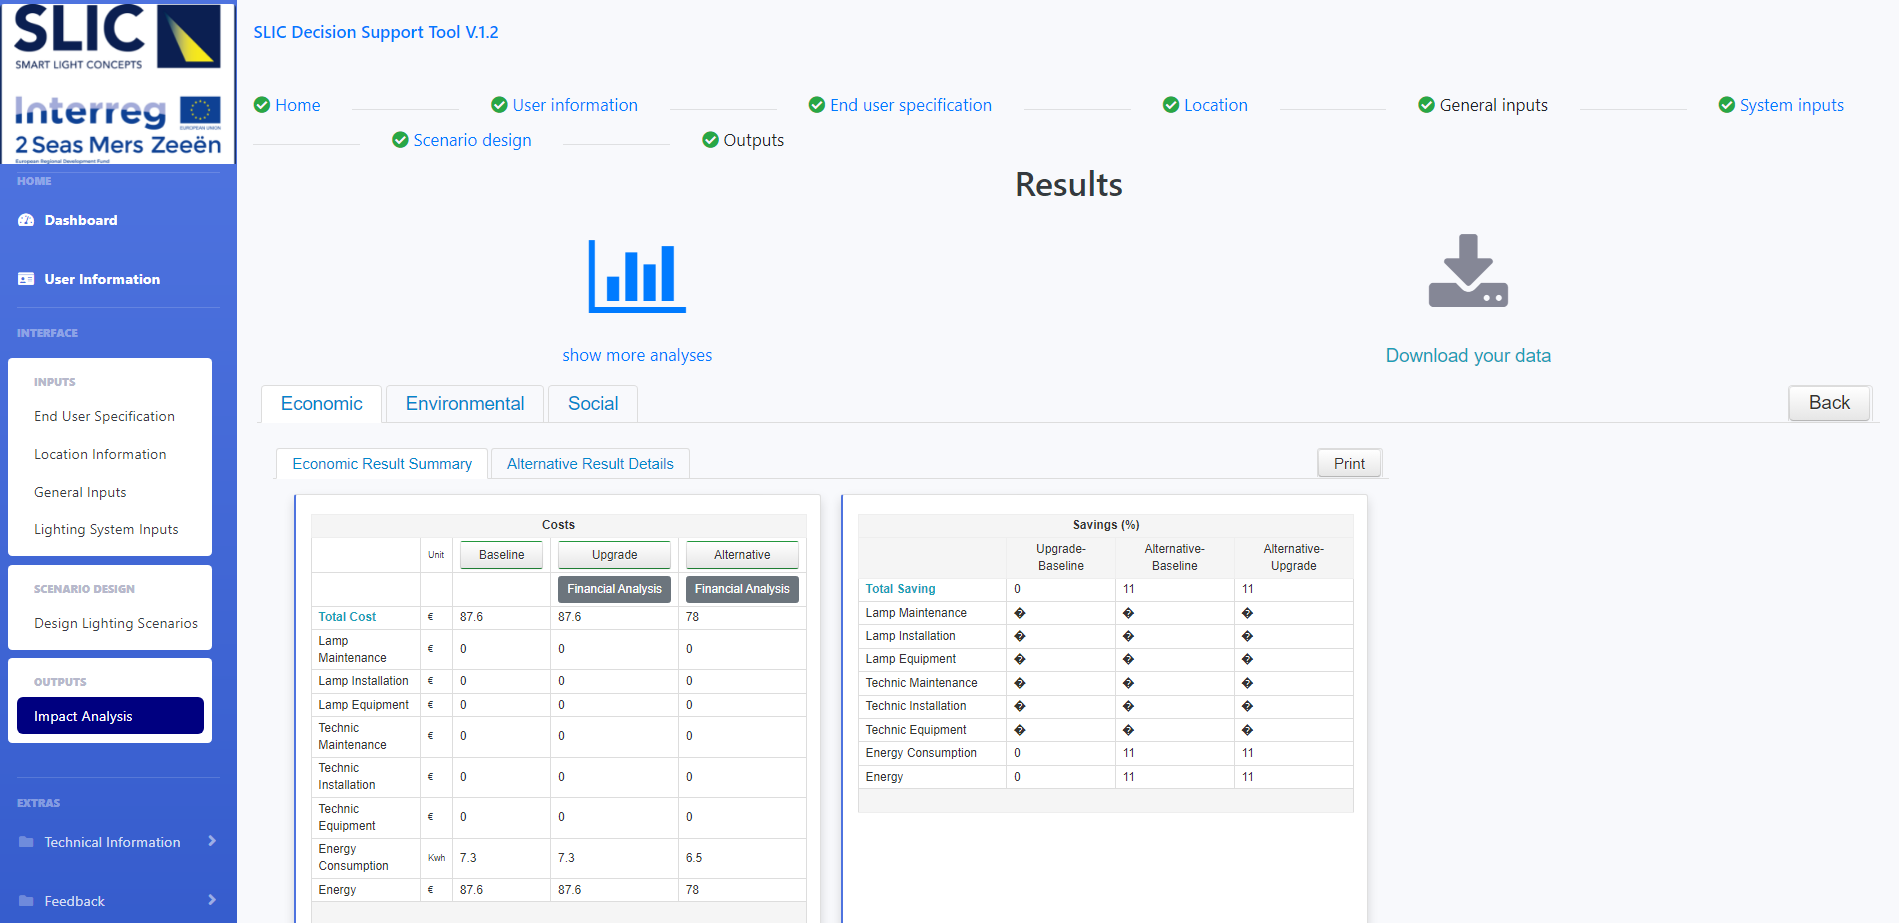
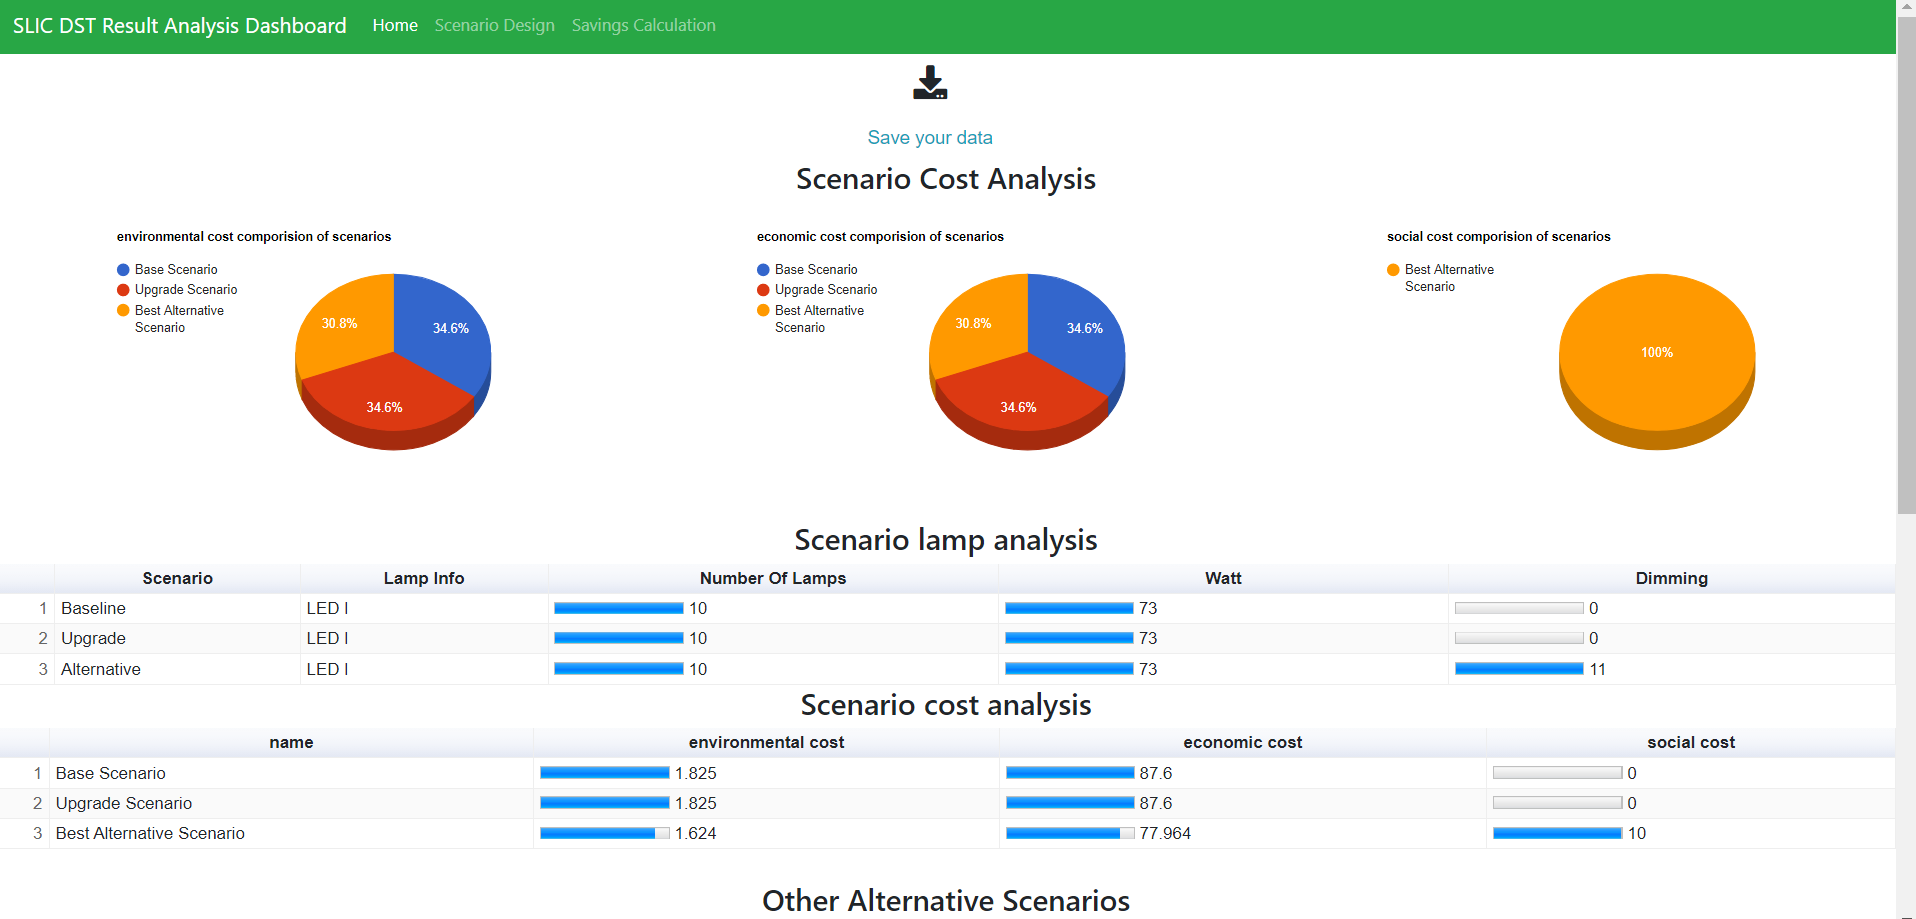
Impact Analysis
If everything goes well in the inputs, the result analysis page will be shown.
In this page, a comparision between scenarios and details about the scenarios are provided.